Installing a travel eSIM on your iPhone is an easy way to stay connected while traveling abroad—no need for physical SIM cards or roaming headaches. Follow this detailed guide to get your eSIM up and running using a QR code.
Step 1: Prepare to Install
Before starting, make sure:
You have an internet connection: WiFi or mobile data is required during setup.
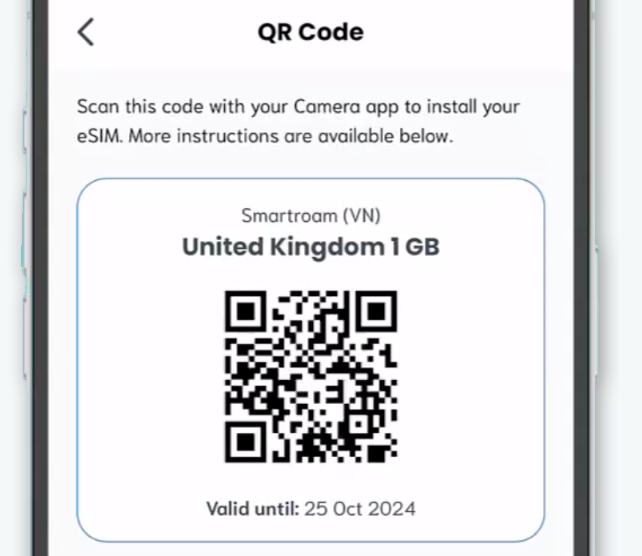
Your QR code is ready: Locate the QR code sent to your email or the Sim Local app when you purchased your eSIM plan. If you purchased your plan from an airport kiosk, simply scan the barcode on the printout.
You'll receive a QR code as soon as you purchase an eSIM
Step 2: Choose a QR Code Scanning Method
There are three ways to scan the QR code to install your eSIM. Pick the one that works best for you. The first two methods will need a second device to display the QR code, like on a laptop, desktop, or another smartphone. Or maybe you have a printout of the QR code? Perfect.
Option 1: Using the Camera App
Open the Camera app on the iPhone where you’ll install the eSIM.
Point the camera at your QR code (found in your inbox or the Sim Local app).
A yellow notification will appear—tap it and follow the prompts to complete the setup.
Option 2: Using iPhone Settings
Go to Settings > Mobile Service (or Cellular).
Tap Add eSIM, then select Use QR Code.
Scan the QR code using your iPhone’s camera and follow the on-screen instructions.
Option 3: Scanning a Screenshot or Image (iOS 17 and Later)
If you’re using iOS 17 or newer, you can install an eSIM from a screenshot or saved image of the QR code.
For iOS 17.4
Locate the QR code screenshot in your photos.
Tap and hold the QR code, then select Add eSIM from the menu.
For Other iOS 17 Versions
Go to Settings > Mobile Service (or Cellular).
Tap Add eSIM, then select Use QR Code.
Choose Open Photos and select the QR code screenshot from your camera roll.
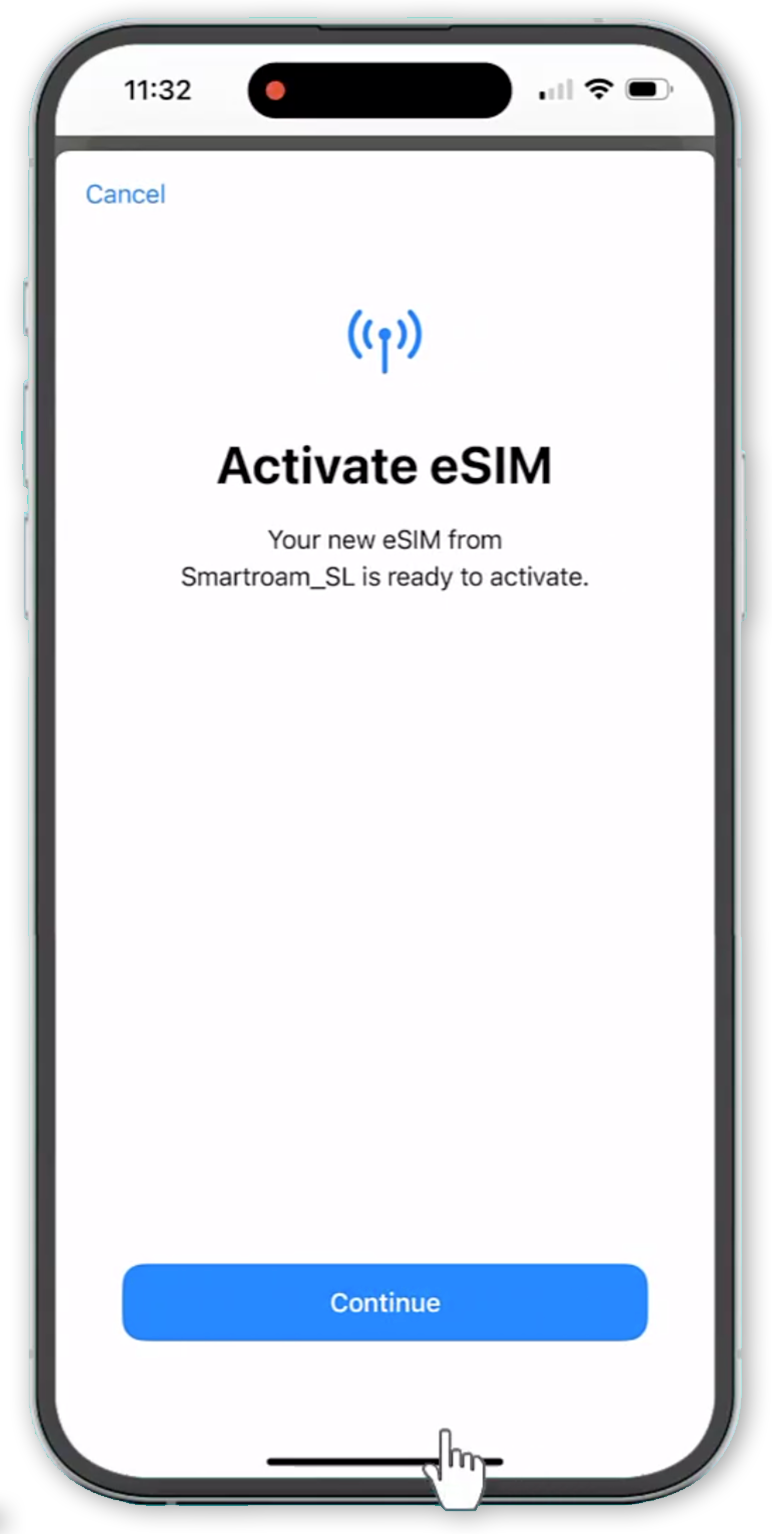
Step 3: Activate & Choose Your Settings
Once you’ve scanned the QR code, follow these steps to complete the installation:
Activate your eSIM
Tap Allow, then Continue when prompted.
Your device will connect to the network (this may take a couple of minutes).
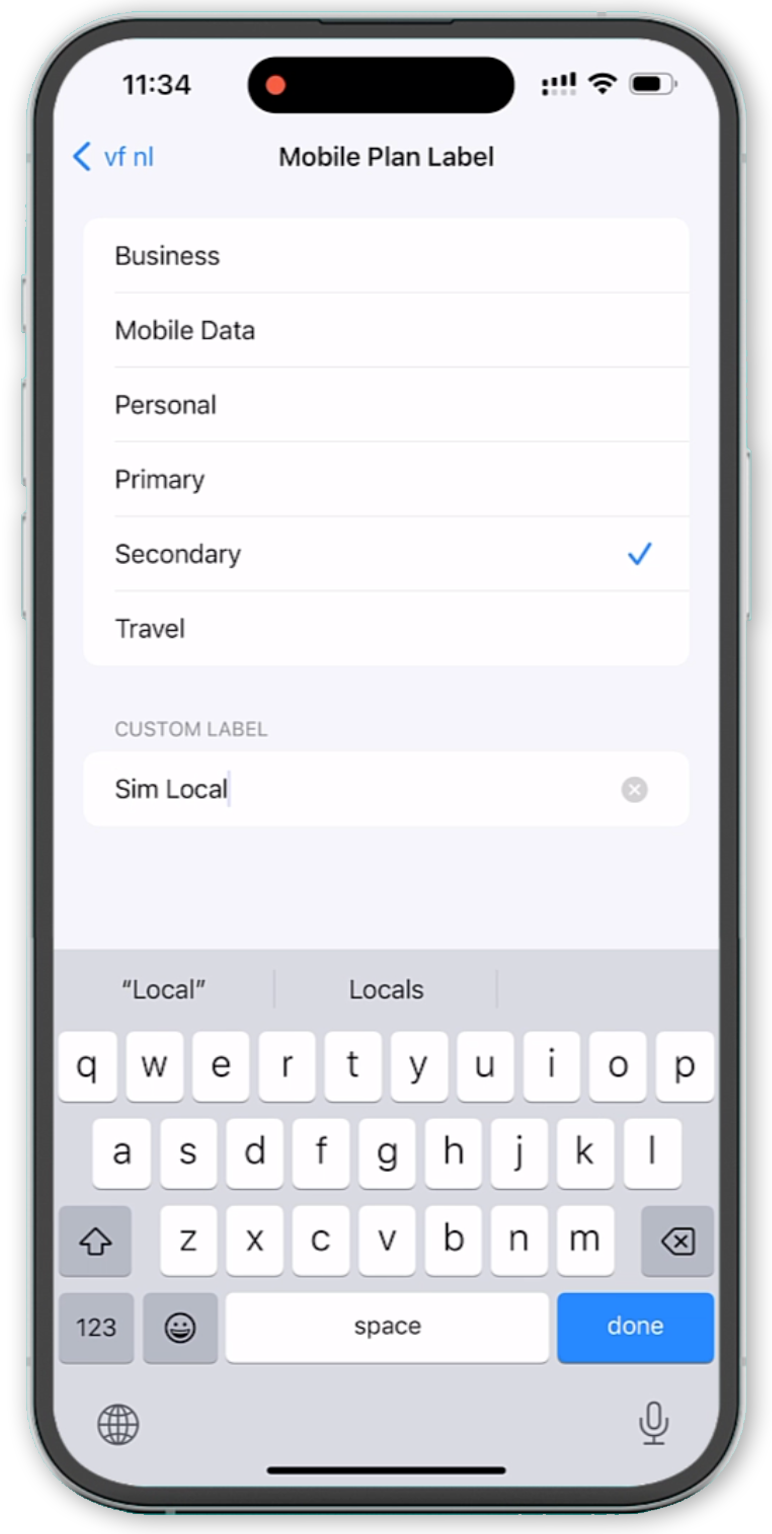
Label your eSIM profile
After activation, you’ll be asked to name your eSIM.
Usually your home SIM is called “Primary” and the eSIM profile is called 'Personal', 'Travel' or 'Secondary'.
But you can choose any custom name you prefer.
We recommend calling it ‘Sim Local’. Naming it after your destination (e.g., “Japan”) can also be helpful.
Please Note: If you don't automatically get prompted to label your new eSIM, you can do it later. Go to Settings > Mobile Service or Cellular > SIMs > [Select Your eSIM] > Mobile Plan Label and choose a new name.
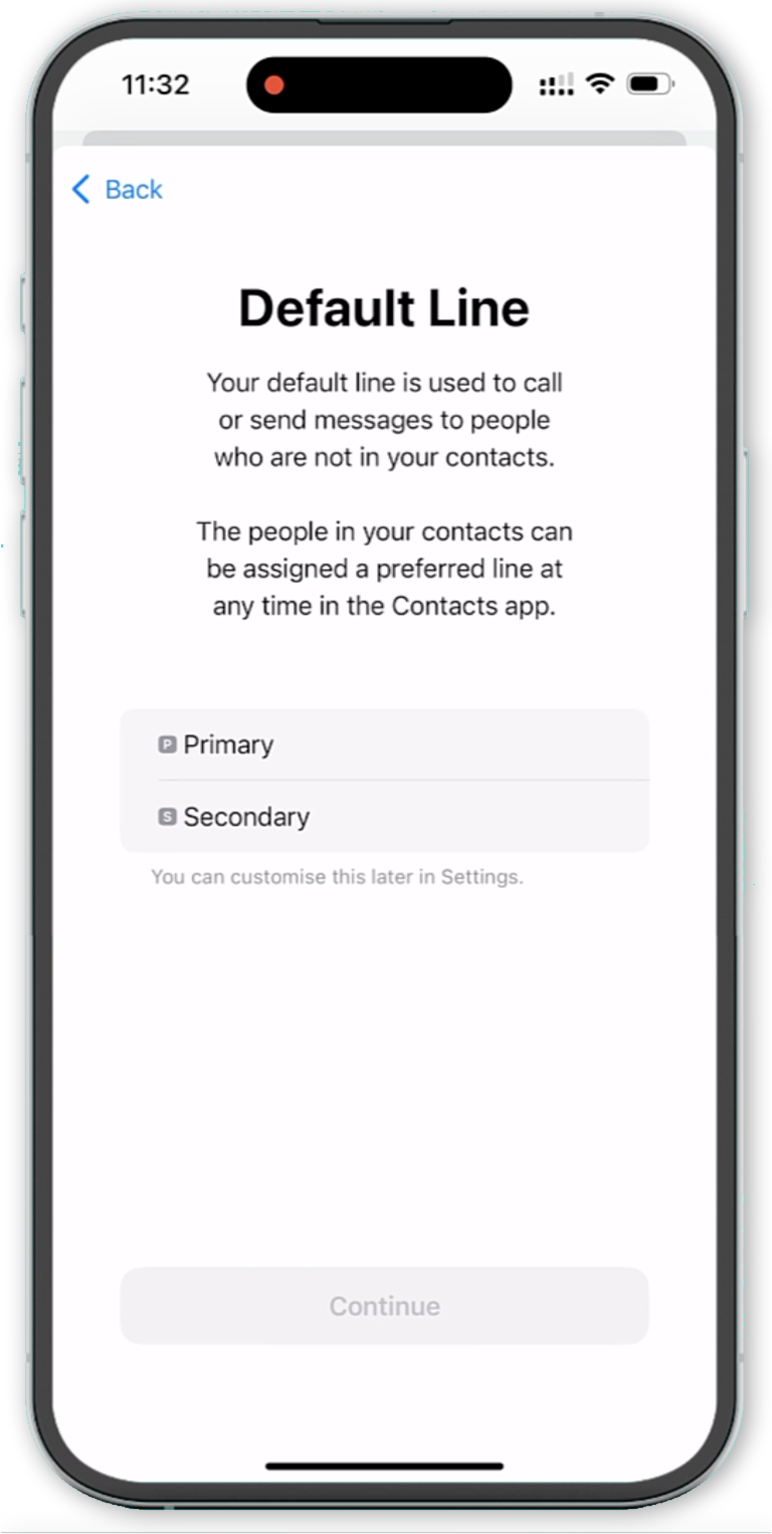
Set your default voice line
If you want to keep receiving calls and texts on your home number, select Primary as your default voice line.
If you prefer to use your eSIM for calls (and the plan includes a phone number), select the new eSIM profile.
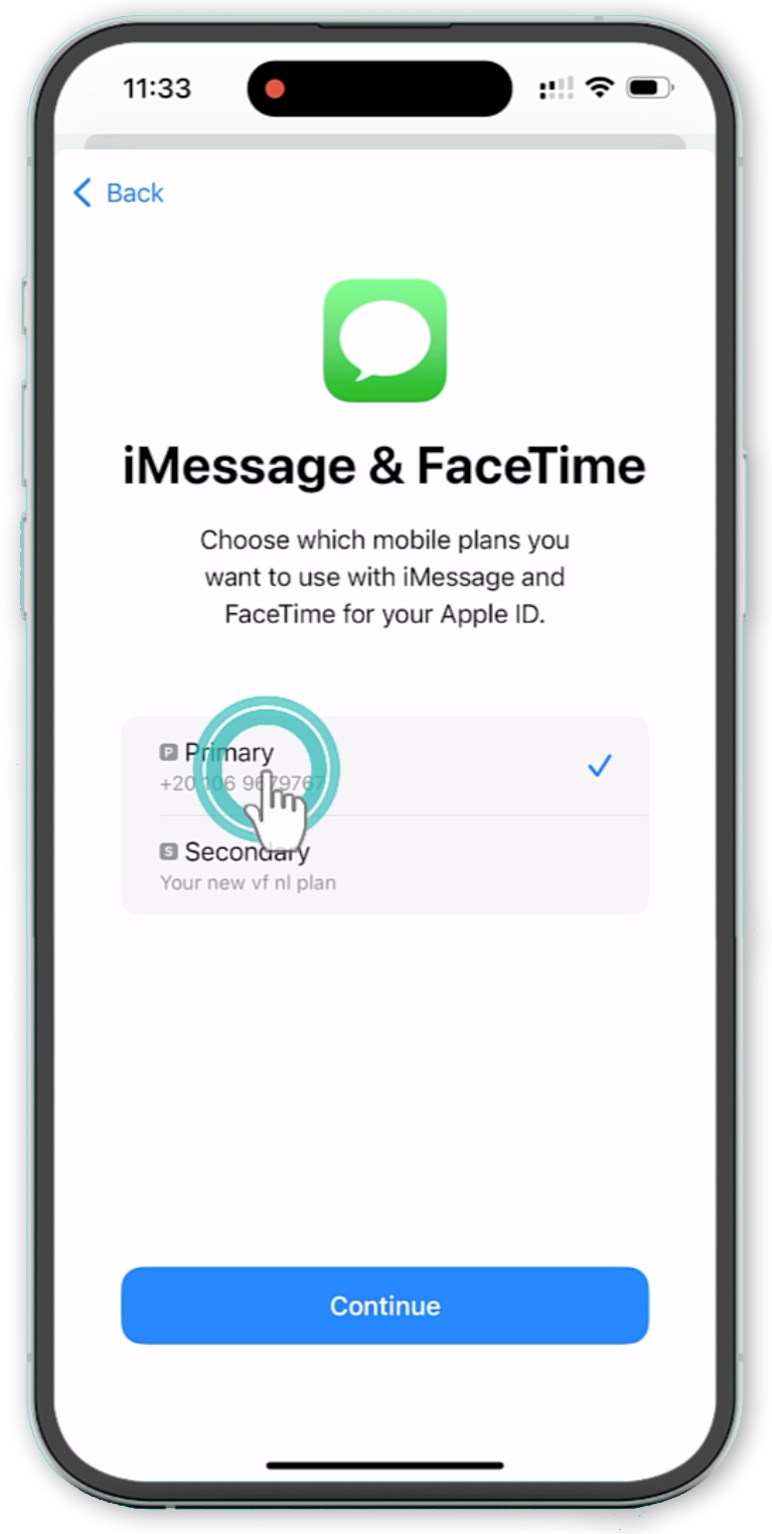
iMessage and FaceTime preferences
Choose Primary to ensure these services continue using your home number
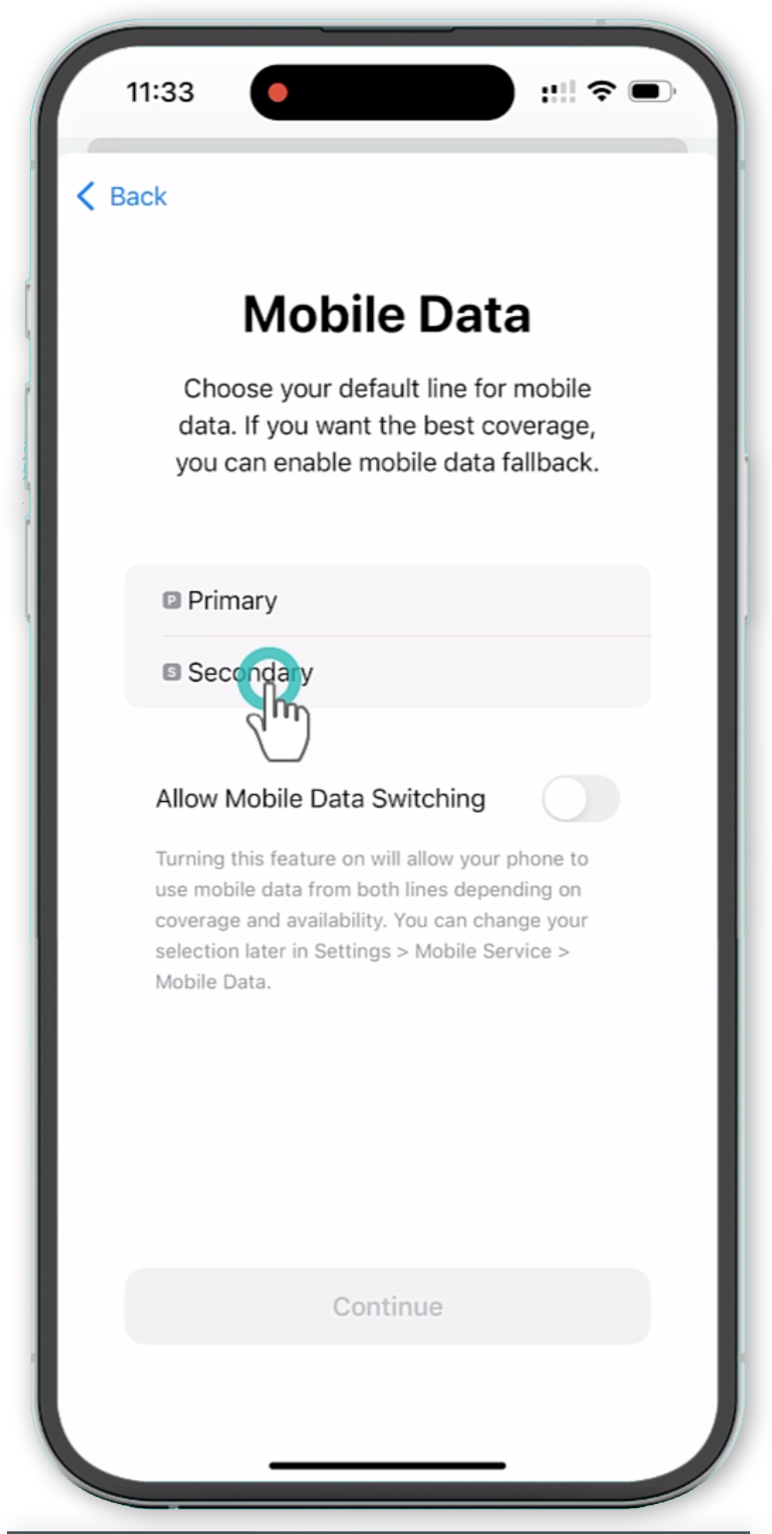
Turn on mobile data for your eSIM
Go to Settings > Mobile Data and select Secondary (or your eSIM profile) to make sure you only use mobile data from this plan.
Turn off Allow Mobile Data Switching to avoid unexpected charges.
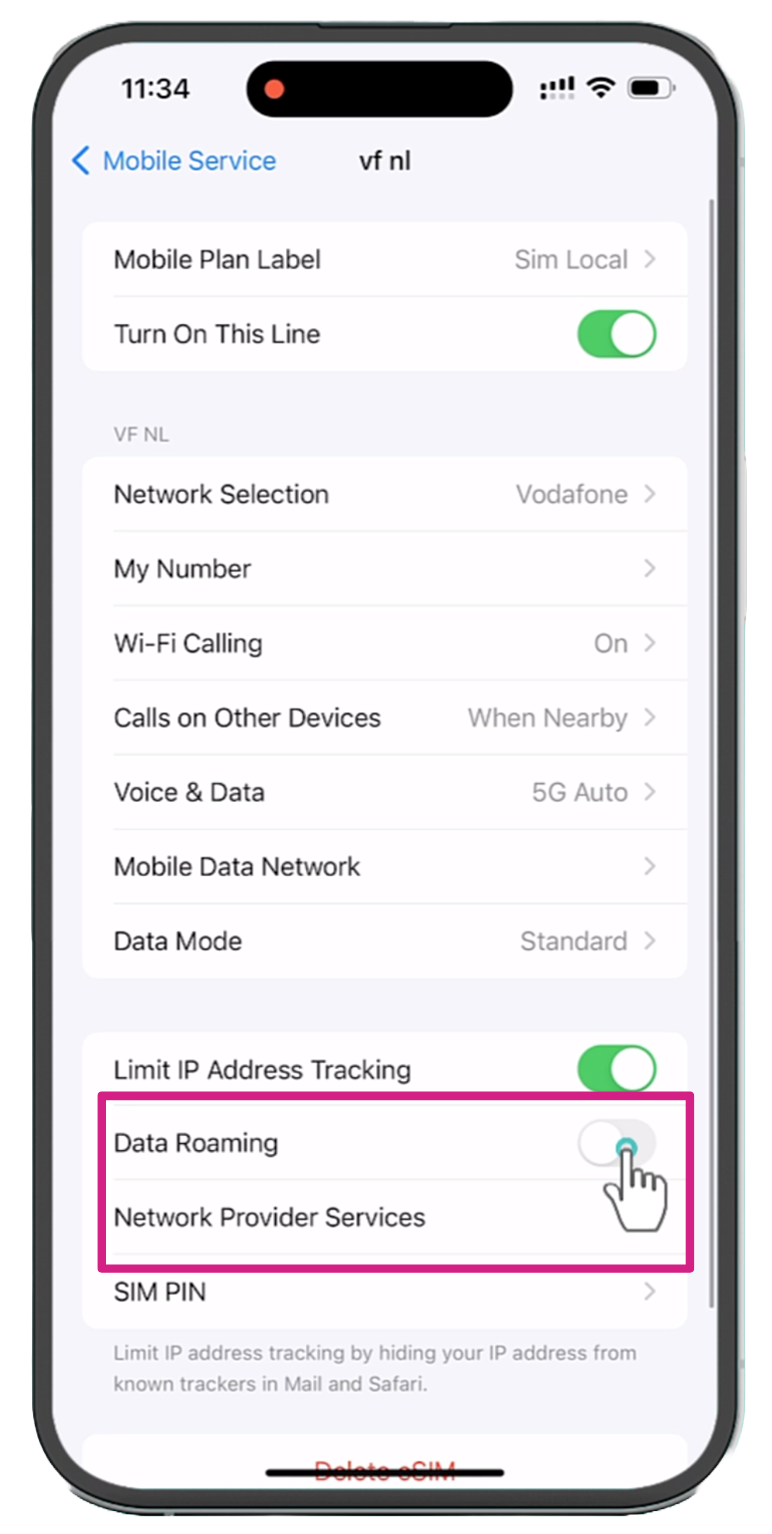
Go to Settings > Mobile Service (or Cellular) > SIMs > [Your eSIM].
Scroll down and toggle Data Roaming to "On."
And you’re all set! With your Sim Local eSIM installed, you can now browse, chat, and stream without worrying about roaming fees or losing a physical SIM card.
If you have any questions or run into issues, contact our customer support team—they’re ready to help by phone, email, chat, and even WhatsApp!
Visiting Boston and overwhelmed by planning things to do, what to see and where to eat? Our favourite Boston local has listed all of the best parts of Boston including where to find the best coffee, best sunset views and must see attractions.
Everything you need to know about the FIFA World Club Cup including who is taking part, how to watch the games online & which eSIM plan you need if you are travelling to any of the games in USA.


 Ask A Local: Insider Tips & Hidden Gems for Boston